


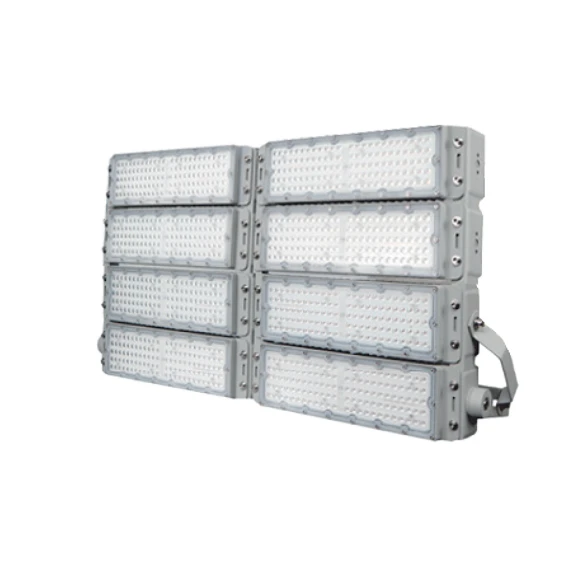
Installing an adjustable floodlight can significantly enhance the lighting of your outdoor space, providing flexibility and functionality. As a reliable Adjustable Floodlight supplier, I'm here to guide you through the installation process step by step.
Tools and Materials You'll Need
Before you start the installation, gather the following tools and materials:
- Adjustable floodlight unit [You can find a great selection of Adjustable Floodlight on our website.]
- Screwdriver set
- Wire strippers
- Electrical tape
- Drill and appropriate drill bits
- Mounting hardware (screws, bolts, etc.)
- Ladder (if needed)
- Voltage tester
Step 1: Choose the Right Location
The first step in installing an adjustable floodlight is to select the ideal location. Consider the following factors:
- Lighting Coverage: Determine the area you want to illuminate. Adjustable floodlights are designed to provide a wide range of lighting angles, so choose a spot that allows you to cover the desired area effectively.
- Mounting Surface: Ensure that the surface where you plan to mount the floodlight is sturdy and can support the weight of the fixture. Common mounting surfaces include walls, poles, and ceilings.
- Access to Power: Locate a nearby electrical outlet or junction box that can supply power to the floodlight. Make sure the power source is compatible with the voltage requirements of the fixture.
Step 2: Prepare the Mounting Surface
Once you've chosen the location, prepare the mounting surface by cleaning it and marking the holes for the mounting hardware. Use a drill to create the holes, making sure they are the appropriate size for the screws or bolts you'll be using.

Step 3: Install the Mounting Bracket
Attach the mounting bracket to the prepared surface using the mounting hardware. Make sure the bracket is level and securely fastened.
Step 4: Connect the Wires
Before connecting the wires, turn off the power to the electrical circuit at the breaker box. Use a voltage tester to confirm that the power is off.
- Identify the Wires: Most adjustable floodlights have three wires: a black (hot) wire, a white (neutral) wire, and a green or bare copper (ground) wire.
- Strip the Wires: Use wire strippers to remove about 3/4 inch of insulation from the ends of the wires.
- Connect the Wires: Connect the black wire from the floodlight to the black (hot) wire in the electrical box. Connect the white wire from the floodlight to the white (neutral) wire in the electrical box. Connect the green or bare copper wire from the floodlight to the ground wire in the electrical box.
- Secure the Connections: Use electrical tape to wrap the wire connections and ensure they are secure.
Step 5: Mount the Floodlight
Once the wires are connected, carefully mount the floodlight to the mounting bracket. Align the holes in the floodlight with the holes in the bracket and insert the screws or bolts. Tighten the hardware to secure the floodlight in place.
Step 6: Test the Floodlight
After mounting the floodlight, turn the power back on at the breaker box. Use a voltage tester to confirm that the power is on. Switch on the floodlight and test its functionality. Adjust the angle of the floodlight to achieve the desired lighting effect.
Step 7: Adjust the Angle
One of the key advantages of an adjustable floodlight is its ability to adjust the angle of the light beam. Most adjustable floodlights have a pivot or swivel mechanism that allows you to change the direction of the light. Use this feature to direct the light where you need it most.
Additional Tips
- Weatherproofing: If you're installing the floodlight outdoors, make sure it is weatherproof. Look for a Waterproof Led Flood Lamp to ensure long-lasting performance in all weather conditions.
- Dimming Options: Some adjustable floodlights come with dimming capabilities, allowing you to control the brightness of the light. If you want to have more control over the lighting, consider choosing a floodlight with dimming options.
- Safety First: Always follow the manufacturer's instructions and safety guidelines when installing an adjustable floodlight. If you're not comfortable working with electrical wiring, it's recommended to hire a licensed electrician.
Conclusion
Installing an adjustable floodlight is a relatively simple process that can greatly enhance the lighting of your outdoor space. By following these steps and using the right tools and materials, you can install a floodlight that provides flexibility, functionality, and energy efficiency. If you're in the market for a high-quality adjustable floodlight, we offer a wide range of products to meet your needs. Check out our 800W Floodlight for powerful and reliable lighting solutions.
If you have any questions or would like to discuss your specific lighting requirements, please feel free to contact us. We're here to help you find the perfect adjustable floodlight for your project.
References
- Electrical Installation Guide for Adjustable Floodlights
- Manufacturer's Instructions for Adjustable Floodlight Fixtures